First impressions in real estate don’t happen at the front door anymore – they happen online, within seconds of a potential buyer scrolling through a listing. And nothing commands attention quite like a sweeping, crystal-clear panoramic image that makes a property feel expansive, inviting, and worth every penny of the asking price. That’s exactly why understanding Real Estate Panorama Photo Editing Tips has become an essential skill – not just for photographers, but for every agent, developer, and dealer serious about converting views into visits.
Panoramic photography captures a wider field of view than standard shots, giving buyers a genuine sense of space and layout. But raw panoramic images rarely tell the whole story. Stitching errors, uneven lighting, lens distortion, and flat colors can all undermine what should be a showstopping visual. The editing process is where good panoramas become great ones – and great ones become deal-closers.
In this guide, we’ll walk you through everything you need to know to transform your property panoramas from mediocre to magnificent.
Why Panoramic Images Matter in Real Estate Marketing
Before diving into the editing techniques themselves, it’s worth understanding why panoramic images carry such commercial weight. Studies consistently show that listings with high-quality visuals, especially wide and panoramic shots, receive significantly more engagement than those relying on standard photography alone.
Panoramic images offer a few distinct advantages:
- Spatial honesty: Buyers can see how rooms connect, how spaces flow, and how the property is laid out- reducing guesswork and building trust.
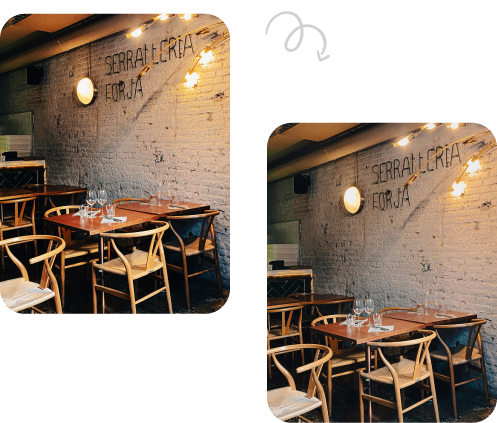
- Emotional impact: A well-edited panorama of a living room at golden hour or a rooftop terrace overlooking the city skyline creates an emotional pull that’s hard to replicate with narrow-angle shots.
- Virtual tour readiness: Panoramas are the backbone of 360-degree virtual tours, which have become a standard expectation in premium property listings.
But the keyword here is well-edited. A poorly stitched or color-inconsistent panorama can do more damage than good, making a property look distorted or unprofessional.
Real Estate Panorama Photo Editing Tips: The Core Techniques
1. Start with Proper Stitching and Alignment
The foundation of any panoramic image is the stitching, the process of blending multiple overlapping photos into a single seamless wide-angle frame. Tools like Adobe Lightroom, Photoshop, PTGui, and Hugin are industry favorites. Always shoot with at least 30% overlap between frames to give the software enough data to stitch cleanly.
After stitching, check for misalignment along edges, ghosting (blurred areas where movement occurred between shots), and warped lines in architectural elements. Straight walls should look straight. Horizontal lines, window frames, countertops, and rooflines should be level. Any deviation signals a stitching error that needs manual correction.
2. Correct Lens Distortion and Perspective
Wide-angle lenses, by their nature, introduce barrel distortion- that subtle bowing effect where straight lines appear to curve outward. In architectural photography, this is particularly noticeable along walls, ceilings, and floors. Use the Lens Correction panel in Lightroom or the Adaptive Wide Angle filter in Photoshop to bring those lines back into true vertical and horizontal alignment.
Perspective correction is equally important. If the camera was even slightly tilted during the shoot, vertical lines like door frames and columns will appear to converge or lean. Correcting this makes the property look grounded, professional, and architecturally accurate – which matters enormously for high-end listings.
3. Balance Exposure and HDR Blending
One of the most common challenges in real estate photography is the dramatic difference in brightness between interior spaces and windows or outdoor views. A room might be perfectly exposed, but the view through the window is completely blown out- a blown-out sky or overexposed exterior immediately reduces the perceived quality of the image.
The solution? HDR (High Dynamic Range) blending. Shoot multiple exposures for each frame (typically three: underexposed, correctly exposed, and overexposed) and blend them in post-processing using tools like Photomatix, Aurora HDR, or Lightroom’s built-in merge feature. The result is a balanced image where both the interior and the exterior views are clearly visible and properly lit.
4. Master Color Grading and White Balance
Color consistency across a panoramic image is non-negotiable. Because panoramas are made from multiple photos, each frame might have slight differences in color temperature – especially if the lighting changed between shots, or if different areas of the room were lit by different light sources (warm tungsten vs. cool daylight, for instance).
Start by matching the white balance across all frames before stitching. Then, in post-production, use selective color adjustments to ensure walls, floors, and fixtures look consistent from one end of the panorama to the other. For real estate, a slightly warm, neutral color palette tends to perform best, it feels welcoming without looking oversaturated or artificial.
5. Sky Replacement and Exterior Enhancement
A grey, overcast sky can flatten even the most beautiful exterior panorama. Sky replacement has become a standard technique in real estate editing and modern AI tools have made it remarkably convincing. Photoshop’s Sky Replacement feature, Luminar Neo, and similar tools can swap a dull sky for a dramatic golden-hour palette or a clean, bright blue within minutes.
The key is to keep it realistic. A real estate image should enhance the property, not misrepresent it. Opt for skies that could plausibly occur in the property’s location and season. While enhancing the exterior, also consider adjusting the saturation of lawns, cleaning up driveways digitally, and removing temporary eyesores like parked cars or garbage bins.
6. Sharpening, Noise Reduction, and Final Cleanup
After all the major edits are done, refine the image with targeted sharpening to bring out architectural details, the texture of a brick wall, the grain of hardwood floors, the clean edge of a marble countertop. Balance this with noise reduction, particularly in shadow areas where digital noise tends to cluster, especially in interior shots taken in lower light conditions.
Finally, do a thorough cleanup pass. Remove sensor dust spots, fix any remaining stitching seams, and retouch minor blemishes like scuff marks on floors or smudges on windows. These small details collectively elevate the image from competent to impressive.
Read Also- Importance of Panorama Photo Editing in Real Estate Listing
More Real Estate Panorama Photo Editing Tips: Workflow Efficiency
Build and Use Presets
If you’re editing multiple listings, custom Lightroom presets, or Photoshop actions can dramatically cut your editing time. Create presets for common scenarios, daylight interiors, twilight exteriors, overcast conditions, and apply them as a starting point before fine-tuning individual images. This keeps your portfolio visually consistent while reducing repetitive work.
Use Layers and Non-Destructive Editing
Always edit non-destructively. Work in layers in Photoshop, use virtual copies in Lightroom, and maintain your original raw files. This gives you the flexibility to revisit and revise edits without degrading image quality, especially useful when clients request changes after delivery.
Output for Multiple Platforms
A panoramic image used in a property listing has different technical requirements than one used in a 360-degree virtual tour or printed marketing collateral. Export your files in multiple formats and resolutions: high-resolution JPEGs for print, web-optimized files for portals, and equirectangular projections for VR-ready tours. Being platform-ready from the outset saves significant time downstream.
When to Hire a Professional Real Estate Panorama Photo Editing Service
Even with the best tools and tutorials at your disposal, editing high-volume real estate panoramas is time-intensive work. For agents managing multiple listings, or developers handling large residential or commercial projects, outsourcing to a professional Real Estate Panorama Photo Editing Services provider can be a game-changing decision.
A specialized Real Estate Panorama Photo Editing Company brings not just technical expertise but also speed and scalability. Turnaround times that might take an in-house team days can often be accomplished overnight, with consistent quality across dozens or even hundreds of images. This is especially valuable during high-volume seasons or pre-launch phases of major developments.
When evaluating providers, look for a portfolio that demonstrates expertise in architectural photography specifically, not just general photo editing. Review their approach to HDR blending, sky replacement, and color consistency. Ask about file delivery formats and revision policies. A quality Real Estate Panorama Image Editing Services partner will treat every image as a representation of your brand, not just a task to check off a list.
Conclusion
In today’s visually driven property market, panoramic images are one of the most powerful tools in a real estate professional’s arsenal, but only when they’re executed with precision and intention. From proper stitching and exposure balancing to color grading and sky enhancement, every step in the editing process contributes to the final impression a listing makes on potential buyers.
By applying the Real Estate Panorama Photo Editing Tips outlined in this guide, you can elevate your property visuals from standard to spectacular, building buyer confidence, increasing engagement, and ultimately supporting faster, more profitable sales. Whether you choose to develop these skills in-house or partner with a professional editing service, the investment in quality imagery always pays dividends in real estate.
FAQs: Real Estate Panorama Photo Editing Tips
1. What software is best for real estate panorama photo editing?
The most widely used tools among real estate photographers and editors include Adobe Lightroom and Photoshop for color correction, retouching, and sky replacement; PTGui and Hugin for advanced panoramic stitching; and Photomatix or Aurora HDR for HDR blending. Luminar Neo is also popular for its AI-powered sky replacement and enhancement features. The right choice depends on your workflow, budget, and the complexity of the projects you’re handling.
2. How many photos do I need to shoot to create a high-quality panorama?
The number varies depending on the width of the panorama you want to create and the focal length of your lens. As a general rule, shoot enough frames to cover the full scene with at least 30% overlap between each image. For a full 360-degree panorama of an interior space, this typically means 8–20 frames at different horizontal angles, often combined with separate shots for the floor and ceiling if creating a full spherical panorama for virtual tours.
3. Is sky replacement in real estate photos considered ethical?
Sky replacement is widely accepted in real estate photography as a standard enhancement technique, provided the replacement sky is realistic and not misleading. Replacing an overcast grey sky with a bright blue one or a golden-hour palette is considered a cosmetic enhancement, similar to cleaning a property before a shoot. What crosses ethical lines is using sky replacement to misrepresent the property’s environment for example, replacing the sky in a way that hides a nearby industrial facility or makes a landlocked property appear to have ocean views.
4. How long does professional real estate panorama editing typically take?
The turnaround time depends on the scope of the project and the service provider. For individual listings, a professional editing service can typically deliver edited panoramas within 24 to 48 hours. For larger projects, such as multi-unit developments or commercial properties requiring extensive virtual tour preparation, timelines may extend to 3-5 business days. Many established editing companies offer rush delivery options for time-sensitive listings.
5. Can panoramic images be used directly in virtual tours and 360-degree walkthroughs?
Yes, but they need to be formatted correctly. Virtual tours require panoramic images in an equirectangular projection – a specific mapping format that allows the image to wrap seamlessly around a spherical viewer. Standard panoramas exported for web listings or print are typically in a flat, elongated format that is not suitable for direct use in 360-degree platforms. Most professional editing services that specialize in real estate can deliver both formats simultaneously, ensuring your images are ready for every use case from the outset.