If you’ve ever tried capturing real estate photos, you know how tricky lighting can be. Some areas are too bright, others are too dark, and details get lost. That’s where HDR (High Dynamic Range) photography comes in – it balances lighting and enhances details, making property photos look stunning. If you want to create perfect HDR real estate photos this article is for you.
I’ve spent years perfecting my HDR real estate photography skills, and I’m excited to share my process with you. Follow these steps to create high-quality HDR real estate photos that will impress clients and potential buyers.
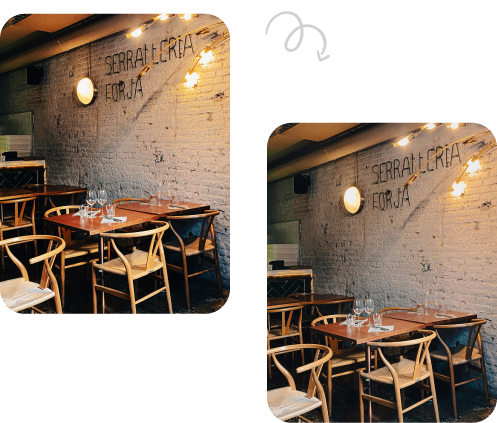
Explore our Real Estate Photo Editing Services to learn more.
Tips To Create Perfect HDR Real Estate Photos
Step 1: Get the Right Equipment
To capture great HDR real estate photos, you’ll need:
- A DSLR or Mirrorless Camera – Cameras with manual settings work best.
- A Sturdy Tripod – HDR requires multiple shots at different exposures, so stability is key.
- A Wide-Angle Lens – Essential for capturing entire rooms.
- A Remote Shutter or Timer – To avoid camera shake.
Step 2: Shoot in RAW Format
Always shoot in RAW rather than JPEG. RAW files preserve more details, allowing you to recover highlights and shadows during post-processing.
Step 3: Set Up Your Camera for Bracketing
HDR photography works by merging multiple exposures. Bracketing helps by automatically capturing a series of images at different brightness levels.
- Enable Auto Exposure Bracketing (AEB) in your camera settings.
- Set it to capture at least three shots: one underexposed, one correctly exposed, and one overexposed.
- If lighting conditions are extreme, consider shooting five to seven exposures for more detail.
Step 4: Adjust Camera Settings
Use these recommended settings for the best results:
- ISO: Keep it as low as possible (100–200) to reduce noise.
- Aperture: Set it between f/7.1 and f/11 for sharp images.
- Shutter Speed: Let the camera adjust based on the bracketing settings.
- White Balance: Set manually to maintain color consistency.
Step 5: Compose Your Shots Carefully
- Use a tripod to keep your shots aligned.
- Position yourself at an angle that best showcases the space.
- Avoid including too much ceiling or floor—focus on the best features.
- Use natural light when possible, but turn on interior lights for warmth.
Step 6: Capture the Bracketed Images
Press the shutter once, and your camera will take multiple exposures. Be patient and ensure there’s no movement between shots to avoid ghosting (blurry spots when merging images).
Step 7: Process the HDR Images
Once you have your bracketed shots, it’s time to merge and edit them using software like:
- Adobe Lightroom (for merging and basic adjustments)
- Photomatix (popular for real estate HDR processing)
- Aurora HDR (AI-powered HDR processing)
Steps for Editing HDR Photos:
- Merge Exposures: Use your HDR photo editing software to blend the bracketed images.
- Adjust Highlights & Shadows: Bring out details in both bright and dark areas.
- Correct White Balance: Ensure colors look natural.
- Enhance Sharpness: Slightly increase clarity for a crisp look.
- Fix Distortion: Correct any lens distortion or perspective issues.
- Remove Unwanted Objects: Use cloning tools to remove distractions.
Step 8: Final Touch-Ups and Export
- Apply slight contrast and vibrance for a natural look.
- Avoid excessive saturation—over-processing makes images look fake.
- Export in high resolution (JPEG or TIFF) for the best quality.
- Optimize file size for web uploads without losing clarity.
Bonus Tips for Perfect HDR Real Estate Photos
- Use natural light wisely – Morning and late afternoon offer the best lighting.
- Don’t overdo HDR effects – Keep it realistic to maintain a professional look.
- Stage the property – Remove clutter and add minimal decor for a clean, inviting feel.
- Keep colors true-to-life – Over-saturation can turn buyers away.
- Test different editing styles – Find what works best for your market.
Final Thoughts
Mastering HDR real estate photography takes practice, but once you get the hang of it, you’ll create stunning images that attract buyers and impress clients. The key is to balance exposure, use proper equipment, and edit naturally.
With these steps, you’re on your way to taking professional-quality HDR real estate photos.